Thursday 18 December 2008

New Budgie Calendars 2009

New and Exclusive!! 2009 Calendars with photographs by Mick Freakley

Get yours today and be the envy of all your friends!

Exhibition Budgerigars

Featuring 12 amazing pictures of Exhibition budgerigars from the Freakley and Ainley Stud, including pictures of the 2 World Champion winning birds!


Only available at http://adorablebudgies.co.uk/cal.php


Wild Birds

This calender contains 12 stunning pictures of wild birds in their natural habitats. Mick has photographed these birds in all their true glory.


Only available at http://adorablebudgies.co.uk/cal.php

Bugs Alive!

A collection of natures wonderful little creatures, dragonflies and butterflies as seen through Micks camera lens. Unbelievably clear and colourful close-ups!


Only available at http://adorablebudgies.co.uk/cal.php


Adorable Budgies 2009 Calendar


A Different Picture And Caption For Each Month!


Following the success of our 2008 calender, we are proud to announce that the 2009 calendar is now ready!

Ihese calendars are only, and will only, ever be available from the Adorable Budgies Website though, so if you're interested, just take a wander over there by clicking here

Anna

Wednesday 17 December 2008

Footballer Budgie


Buzzo totally loves his ball. I once brought another chick in from the aviary for him to have friend, but even after 2 months he showed her zero interest and just carried on playing with his toys. Weird bird LOL


Anna

Tuesday 16 December 2008

Clipping a budgies nails

I've recently asked forum members if they'd be interested in writing an article or 2 for Adorable Budgies

This is the 2nd (the splayed legs being the first) article I've received so far.

Sending out a great big thanks to our forum members who make our forum so worthwhile!

Clipping a budgies nails

Budgie's nails are similar to humans, they grow and some grow faster than others. We cut our own nails and this is what we sometimes have to do to our birds nails.

Please be aware the more you cut your birds nails the more they'll need cut as they will grow faster.

Ok, so you have a budgie, and you notice it's nails are too long. What do you do?

There is a simple and effective way to trim/clip a budgerigars nails.

First you will need a good pair of nail clippers or a pair of animal claw trimming scissors. Secondly hold the budgie in a firm but gentle way as illustrated in the How to hold a budgie section under Holding when needing to check claws and vent etc, making sure the claws are easily accessible.

It may be an idea to get a friend to help with the holding bit as then you can concentrate and doing the job confidently and quickly.

The key is to be confident in what you are doing and act calmly and quietly. This will reassure the bird and in turn the bird will be calmer and the job should be easier to do.

There is a main blood vessel that runs down the nail of a budgie. This is easily seen and this is the part you must avoid! The end of the nail, which will look clearish is the part you need to trim. It's better to clip little bits off at a time rather than too much in one go. If you hit the blood vessel you will notice spots of blood coming from the end of the birds nail. It can be a little blood or a lot depending on how far into the "quick" you've gone.

If you do hit the vessel it is important to put either a styptic pen on the end or cornflour, this will stem the bleeding. The bird must be kept warm and quiet and left to rest and recover from the shock of losing blood. It is very similar to cutting into the quick of our own nails only budgies cannot lose a lot of blood before it becomes a danger to them.

If you do not feel confident to undertake this, it would be advisable to seek veterinary advice or even a known breeder in your area may be able to help and show you the first time so you are confident to do it again if the need should arise.

Good luck!!

===========Resource Box===========
Kay Bell keeps and breeds pet budgerigars.Contact her
for help and advice via the Adorable Budgies Forum
http://adorablebudgies.co.uk/forum
====================================
This article is available for reprint in your opt-in ezine,
web site or ebook. You MUST agree not to make any changes
to the article and the RESOURCE BOX MUST be included.
(c) Kay Bell All Rights Reserved

Monday 15 December 2008

WARNING! Dangerous Threads On Budgie Toys And Perches

Please please PLEASE make sure you always check your budgies toys for threads that could be hanging down, or harmful bits that could be sticking out.

Back in June I found out first hand how awful it can be for a budgie to get strangled on a thread from a toy.

I was lucky enough to go out into the aviary in time to see her there before she died of strangulation, and it took me 35 minutes to free her and make her comfortable in a hospital cage.

The poor thing looked wretched, her eyes and surrounding areas were totally pitch black, there was a massive bulge of fluid on her neck and I honestly didn't know if she would survive or not.

Sweetpea a few weeks before the accident:


And about half an hour after the accident:


When I took that picture Sweetpea already looked at least 10 times better than she had done just 35 minutes earlier.

It took a lot of time, hard work and loving care to nurse her back to full health, but luckily she got there in the end and is now as happy and healthy as she ever was.

She never did get her full voice back, so sounds a bit like a miniature duck. Apart from that I'm pleased to say she made a full recovery.


Please heed my warning and check over every single one of your budgies toys EVERY DAY!

Anna

p.s. Click Here To Read The Full Story

Preventing Splayed Legs In Budgie Chicks

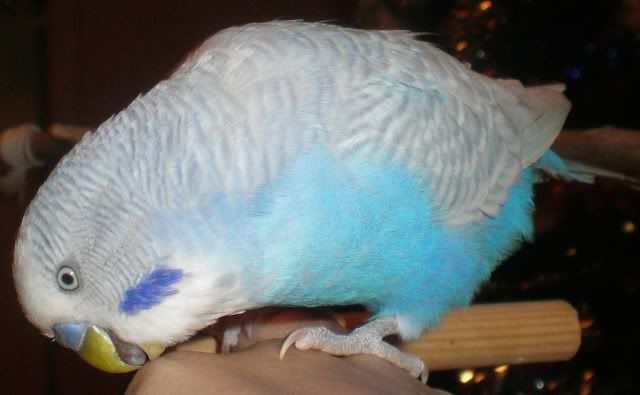
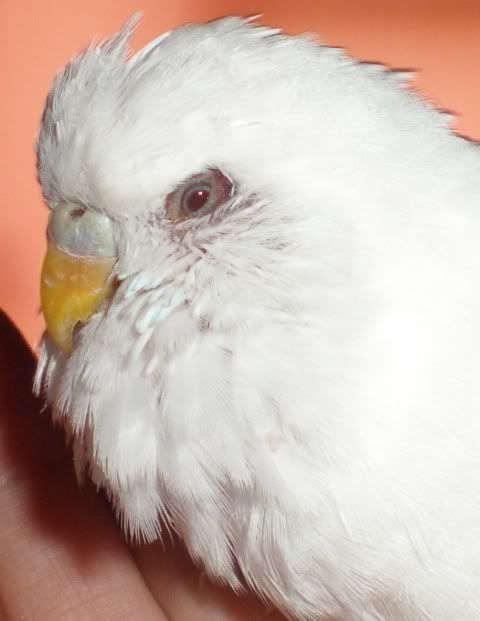
Splayed legs in a chick is where the chicks leg or legs are turned out from the body (a bit like an aeroplane wing) as you see on the chicks left leg below:


Causes of splayed legs can range from things like calcium deficiency, the hen sitting too tight on her chicks and a slippery nest box floor.

To help prevent splayed legs in chicks you must plan ahead. Give the hen extra calcium during her breeding season, Calcivet in her drinking water during laying and while the chicks are growing will help her lay strong eggs and give strong chicks (always follow the instructions on the bottle as Calcivet can be overdosed).

Always leave any unhatched eggs in the nest box as the newly hatched chicks can use them to support themselves. If all the eggs do hatch then place either a glass marble or a white pebble that is just a bit larger than the eggs in with the chicks, this will prevent the hen sitting too tight on her chicks.

A slippery nest box floor, in my opinion, is one of the worst culprits for splayed legs.

As many of you will know the nest box concave is sometimes roughed up by the manufacturer to prevent slipping but the rest of the floor is shiny and slippery and not nearly rough enough for the little chicks feet to grip, causing their legs to slide apart which results in the chicks not being able to stand properly and developing splayed legs.

Use plenty of wood shavings (not saw dust) in the nest box and if possible roughen up the nest box floor. You could also use a canary nest pad as I do. Although I have not seen anyone else use my method in a budgie nest box, it does work for me.

What I did was to cut a wedge out of it and taped it together to form a small cone like shape that fit the concave so the eggs didn't roll out. Another thing that I did (although it's not shown in the picture) was to cut out some more nest pad to shape and covered the rest of the nest box floor with it.

It was just like they had wall to wall carpeting in their nest box and it did stop their feet from slipping about when they went wondering about or stood up.


After all this, if chick still develops splayed legs you can repair them if it's detected early enough by placing a splint on their legs. There are various methods you can use but the most common is to use soft wool.

Personally, I would recommend using a pipe cleaner because it's easier than trying to tie a fiddly knot. With a pipe cleaner you can just bend it around the chicks legs and also they have a soft woolen covering.

To repair splayed legs it's best if the chick is on it's back and there are two people as it makes it easier to bind the legs together.

Firstly, wrap the pipe cleaner around one leg just above the ankle and twist the pipe cleaner to make a loop around the ankle, not too tight but not loose enough for the chick to slip it's foot out.

Next, put the legs together to just less than the normal standing position and wrap the pipe cleaner around the other leg making another loop around the ankle, making sure to cut of any excess pipe cleaner.

The splint will need to be left on for anything from a few days or up to three weeks depending on severity and the age of the chick. Remove the splint every few days to see if the chick can walk. If it's ok then leave the splint off and keep an eye on the chicks progress, but if the legs are still splayed then replace the splint.

Sometimes the hen will reject the chick or try to pull the splint off. If this happens then you may have to hand rear the chick.

Here is a pic of a chick called TeenyWeeny with splayed legs all splinted up;


If splayed legs are not treated early enough then the chick will remain crippled for the rest of it's life. As the chick grows older and develops, it's bones calcify, meaning that their bones will have hardened and are no longer soft and pliable and therefore cannot be corrected so any correction must be done before the chick is two weeks old otherwise it might be too late for the chick.

Although chicks survive and do learn to adapt (with our help) with one splayed leg, having two splayed legs is different because the chick cannot stand at all so all it's weight is on it's vital organs and it will probably die.

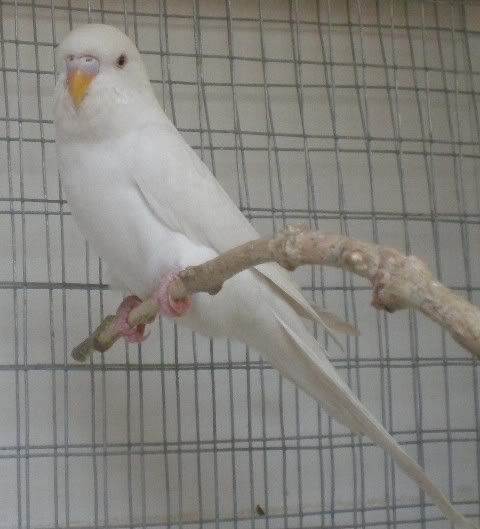
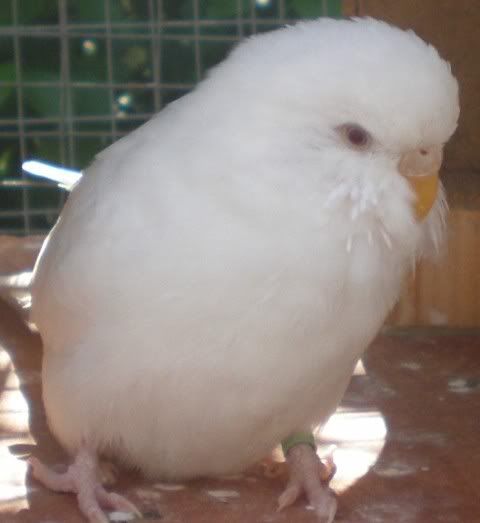
This is TeenyWeeny from the leg splint picture all grown up:


There is another article on splayed legs here
http://www.cagenbird.com/splayed_leg.htm

===============Resource Box===========
Kim keeps pet budgerigars and loves to help new
budgie owners as much as she can.
Visit Adorable Budgies for more information, pictures
and forum http://adorablebudgies.co.uk/forum
====================================
This article is available for reprint in your opt-in ezine,
web site or ebook. You MUST agree not to make any changes
to the article and the RESOURCE BOX MUST be included.
(c) AdorableBudgies.co.uk All Rights Reserved

Special thanks to our forum members Max and Nat for the kind use of their pictures, and to Kim for taking the time to put this article together.

Buying Your First Budgie

As a first time budgie buyer there are certain things to look for and be aware of. This small article points out some of the things you should know.

First and foremost, before you even buy a budgerigar, you need a cage for your future feathered friend. It's always best to have that set up and ready for when you bring the bird home, but what's the best type of cage for you and your bird?

Don't buy a small cage, get the biggest one you can afford and have the room for so that your budgie will have lots of space to move around. It's very important that you get a cage that is actually intended for budgerigars and not for larger birds, as the spacing between the bars of the larger bird cages is usually much bigger and your budgie could squeeze through them or even get stuck between them.

The spacing between the bars shouldn't be more than 1.5cm and the bars should be made of metal rather than plastic. If buying used or 2nd hand make sure there isn't any rust. Try to get a cage that has both horizontal and vertical bars for the birds to climb around them with ease, and also so that it's easy for you to attach feeders and bottles.

A pull-out drawer in the bottom for easy cleaning is also recommended, as is a detachable base. Multiple doors is always a good idea too, for hanging bird baths and nest boxes etc, or for being able to access the inside of the cage if you've already hung one or both of them on it.

Ok, that's the cage sorted, now it's time to think about getting that little bird you so badly want :)

When you go to buy the bird, whether buying from a reputable breeder (recommended) or from a pet shop, take a good look at it to make sure it looks healthy, chirpy and active. No missing feathers, no poop stuck to its bottom. Bright alert eyes are usually a sign of good health. Tail bobbing isn't.

For more information about the health of birds please read How To Recognize A Healthy Budgie (opens in new window).

Both males and females can be tamed and learn to talk, but males tend to pick things up quicker (or so I've heard). Females tend to nip harder than males, but it's never really an excruciatingly painful nip, although it does hurt a bit. Either way, it takes a ton of time and patience to get a bird to talk. Remember, the bird won't really be talking, but rather mimicking what you've taught it.

Make sure you have cuttlebone, iodine block, a bit of millet, fresh food and water (of course). If it's a really young bird, put the food and water in shallow dishes at the bottom of the cage and the perches low.

I don't personally use sandpaper, I prefer to use sand that I buy at the pet shop.

Give the bird a week or 2 to settle in before thinking about letting it out of the cage for a fly-around. Some people prefer to wait until they have the bird at least finger tame before they let it out, as it makes it a tad easier to get them back in.

===============Resource Box===========
Anna-Marie Stewart keeps and breeds pet budgerigars.
Visit Adorable Budgies for information, pictures and forum
http://adorablebudgies.co.uk
====================================
This article is available for reprint in your opt-in ezine,
web site or ebook. You MUST agree not to make any changes
to the article and the RESOURCE BOX MUST be included.
(c) Anna-Marie Stewart All Rights Reserved

Thursday 11 December 2008

The Adorable Budgies Calendar

I made a 2008 calendar back in June this year, exclusively available from my main site Adorable Budgies. I really enjoyed making it and it turned out great, even if I say so myself ;)

There was a picture and a caption for each month, and they looked like these ones:


This year I'm working on multiple calendars to compliment Adorable Budgies, they should be ready soon :D

Anna

Wednesday 10 December 2008

Keeping Budgerigars; One Of Each Sex

Keeping 2 budgies is always beneficial to the birds themselves, although it may make it harder for you to tame them. If you want to tame them and you have 2, then it's best to have 2 males. If you really want to keep 2 birds then 2 males are the best option, as they will rarely bicker and fight, whereas 2 females will spend most of their time doing just that.

It's also totally possible to keep a male and a female in a cage together. There's one thing you need to be aware of when keeping a male and female though, and that is if they're given the right opportunities they WILL mate and breed. I suggest you think very hard about what your plans are for your birds before deciding on one of each sex.

Do you want her to have chicks? If you do, then provide her with a nestbox (you can buy them pretty cheap at pet stores) and put a handful of wood shavings inside it (also available at pet stores)

If they've mated successfully, then she'll start showing an interest in the nestbox, possibly within the next few days, possibly later. It usually takes about 10 days from a successful mating to when the first egg is laid. The hen should then lay an egg every other day, and the clutch of eggs can be anywhere between 1-8 eggs (sometimes even more).

Ask the petstore for eggfood and millet, as the birds will need extra strength to help them rear any chicks they might have. If the eggs are fertile they will start hatching between 18-23 days of being laid.

You don't need to feed the chicks at all, the father will feed the mother, and she will regurgitate the food for the chicks when they get a bit bigger. At first they will be fed by her with something called 'crop-milk' basically the same as mothers milk, but in bird form ;)

The chicks will start getting ready to leave the nestbox somewhere around the age of 28-35 days old, the father will feed them for a little while longer and they'll eventually start feeding themselves. Provide the extras (eggfood and millet) all through the period of mating, laying and rearing, and also while the chicks are learning to become independent.

If you don't want the hen to lay another round after the first chicks have hatched, then remove the nestbox as soon as the chicks leave the nest.

If you just want to keep one of each sex and not have them mate and breed, the solution is pretty simple; Don't give them a nestbox. Budgies will seldom mate without a nest to lay eggs in. I'm not saying it never happens, sometimes it does, and sometimes it even results in a bunch of lovely, healthy chicks. So the choice is down to you which sexes you think you can manage best. Good luck!

===============Resource Box===========
Anna-Marie Stewart keeps and breeds pet budgerigars.
Visit Adorable Budgies for information, pictures and forum
http://adorablebudgies.co.uk
====================================
This article is available for reprint in your opt-in ezine,
web site or ebook. You MUST agree not to make any changes
to the article and the RESOURCE BOX MUST be included.
(c) Anna-Marie Stewart All Rights Reserved
 
Copyright 2008 Anna-Marie Stewart. All Rights Reserved Contact


All images Copyright 2008. All Rights Reserved
Images may not be reproduced in any way, shape or form without the express permission of their respective owners.